For a number of years, my -not so local any more Astronomy Club – Kernow Astronomers, have held a BBQ on the eve of , or very close to the eve of, the Perseid Meteor Shower. The weather on most of these occasions has generally been poor and at worst we’ve been clouded right out. When it has been clear we have seen a lot of cloud about so have had to resort to what we call ‘Keyhole Astronomy ‘ and watch the shower through gaps in the cloud.
This year one of our group suggested that we might try recording this year’s storm using the Meteor Scatter technique using a suitable receiver, a Yagi antenna and a computer. The idea behind this method is you chose a transmitter that is between 300 and 500 km from your receiver. At this distance these transmissions won’t normally be received unless the ionised trail of a meteor reflects them towards the receiver. The problem with this method is that you only know if you have chosen the right frequency when you hear the reflected ping of the transmitted signal.
This all seemed a bit hit and miss and on further reading, a lot of meteor scatter work seems to be done by tuning into the GRAVES Military Radar in the South of France. This transmitter pumps several hundred Kilowatts of continuous-wave radar – if that’s the correct term – into the sky and tracks satellites and space debris passing through French airspace. This transmitter is perfect as the transmitted signal is continuous with no breaks – unlike normal FM radio stations. We also took heart from the work done by the Radio Section at the Norman Lockyer Observatory in Devon, who use the same transmitter and provide a live output of meteor activity on their website.
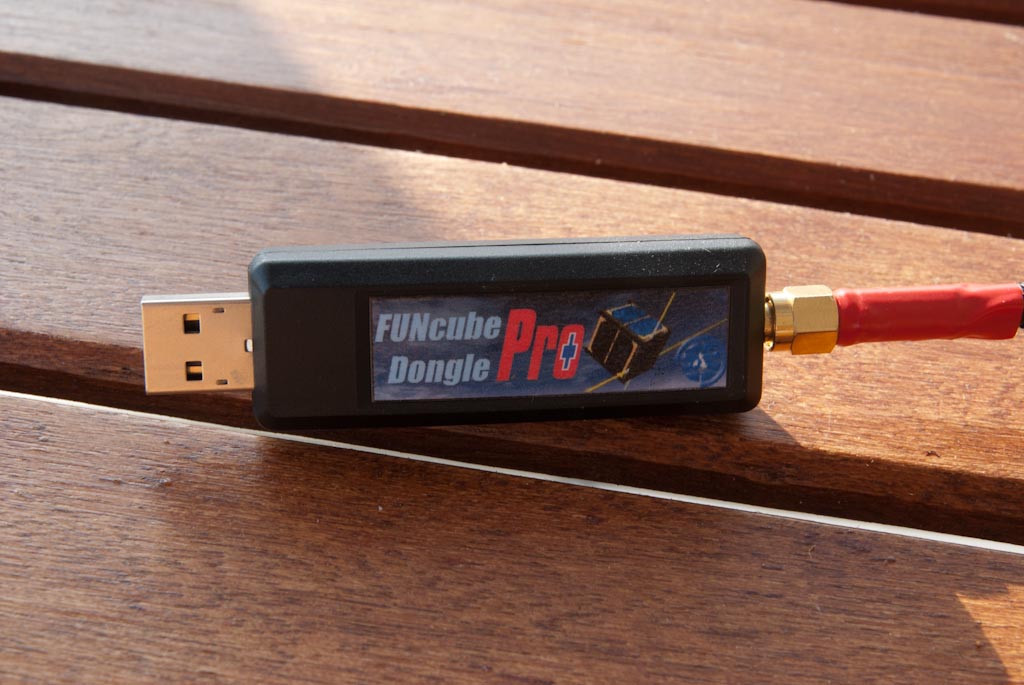
The GRAVES transmitter transmits on a frequency of 143.050 MHz , however normal FM car radios cannot tune this high up the FM band. Another option was to use one of the many types of Ham radio receivers out there, but these can be quite expensive. I then came across a receiver called a ‘FunCube Dongle Pro +’ which costs about £150. This is the size of a memory stick and plugs into a USB port on your pooter. At the other end is an SMA Socket which will accept the 50 Ohm coaxial cable from the Yagi antenna.
The ‘FunCube Dongle’ or FCD, can be tuned into any frequency between 150kHz to 1.9GHz, with a coverage gap between 240MHz and 420MHz. It uses drivers that come with Windows, Linux and Apple Pooters and is controlled through software, which is readily available on the net.
The software allows you to select any frequency the hardware is capable of receiving and it seemed to me, to be the least expensive way of being able to experiment. It’s also been used specifically for Meteor Scatter detection, so I was fairly sure we could get some useful results.
While it is possible to buy a Yagi antenna capable of receiving the 2 metre band we need, it was far simpler and cheaper to build our own. The web has a number of sources of dimensions suitable for this frequency, and we made ours using offcuts of 50mm square wood and 15mm copper plumbing pipe.
The dimensions for the antenna are as follows
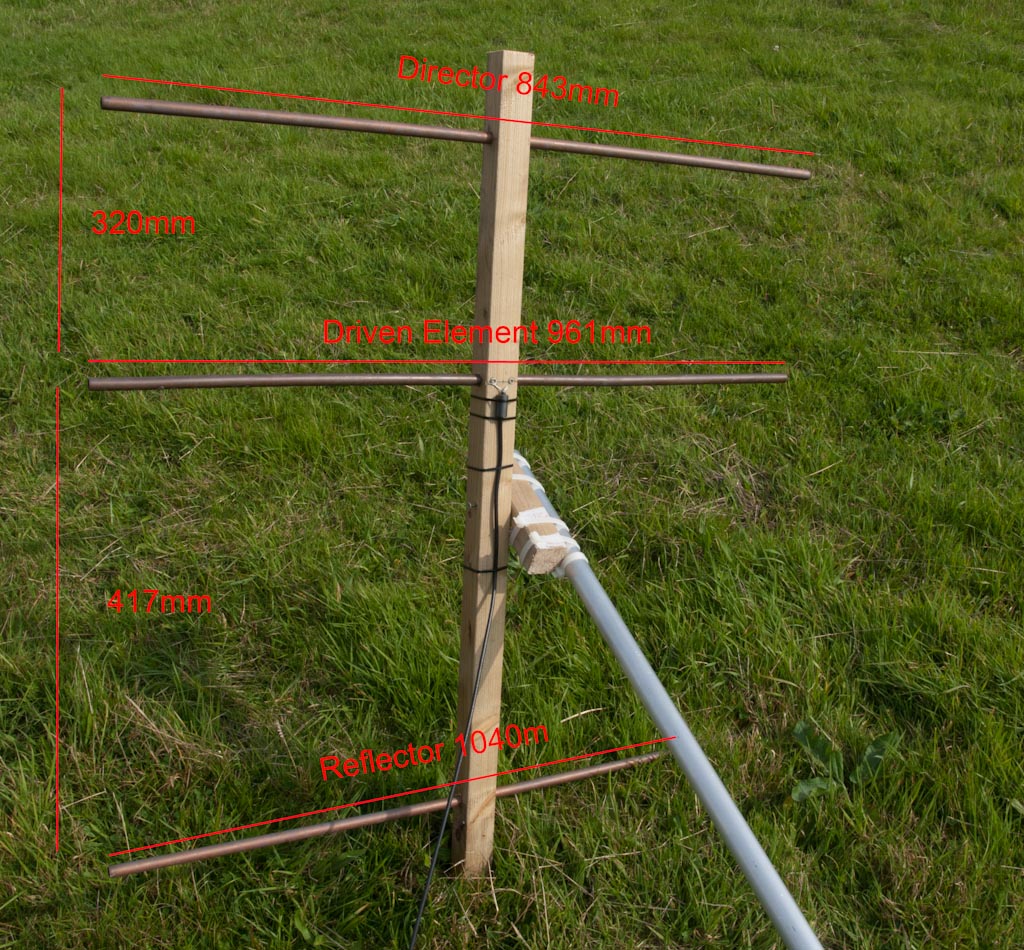
The 50mm square wood supports the copper tube elements and also acts as an insulator. The director and reflector components just pass through 15mm holes drilled into the wood.
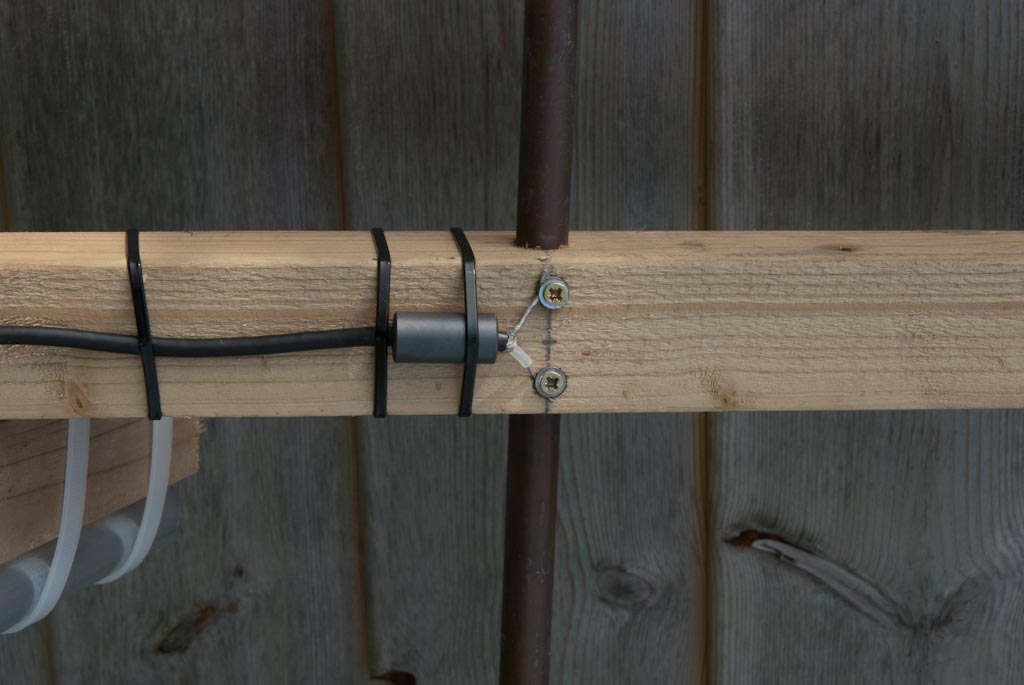
The driven element is split into two halves, each cut into 475mm lengths. To provide insulation between the two tubes as well as to support them , a wooden dowel was passed through the centre of the tubes, leaving a 10mm gap between the ends. The two self tapping screws pass through the wood into the copper tubing to hold everything together, as well as providing a conductive link between the coax core to one tube and the the outer shield to the other.
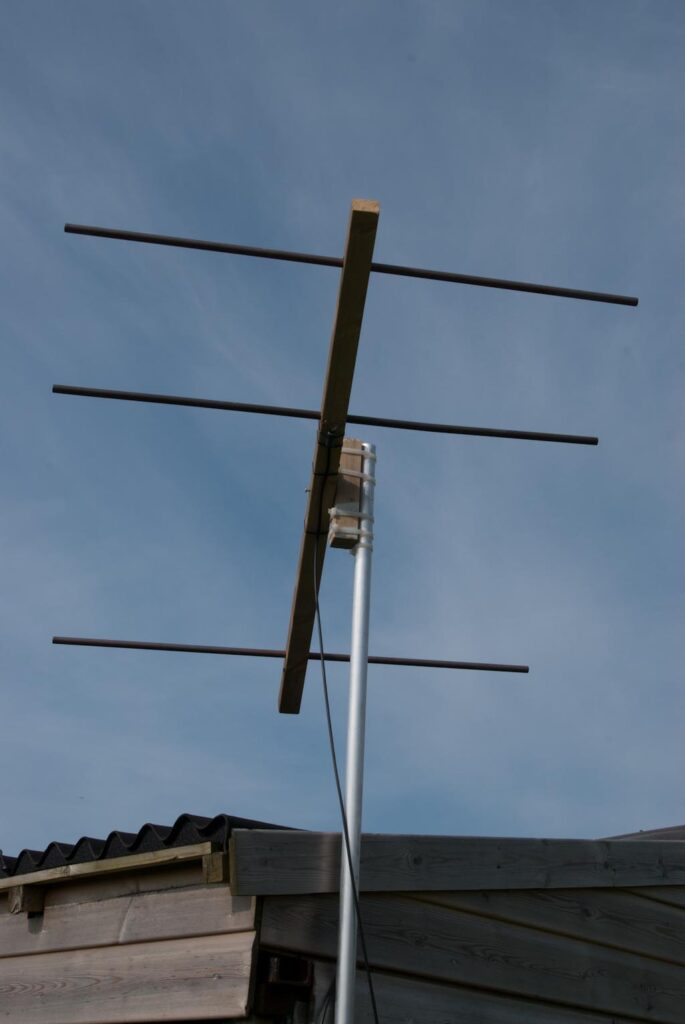
The Yagi is mounted onto the top of a 2.5metre long x 35mm diameter aluminium pole, which is clamped onto the end on my observatory. This raises the antenna about 3.5 metres above ground. Yagi antennas are most sensitive when pointed in the direction of the signal source, so needed to be pointed towards the GRAVES transmitter – Southish from here – and tilted upwards at an angle of about 45 degrees.
The software selection was a little trickier as there were a number of contenders.
Radio SkyPipe 2.0 acts like a data logger and provides you with a graph over whatever time period you care to select. The problem is that while this software saw the FCD, it wouldn’t connect to it. This is a pity as initially I thought a graph with meteorite peaks showing above the background signal would have been ideal for recording the data.
Spectra View was another, but needed a separate bit of software provided with the FCD to set the required receiving frequency. While it did this and provided a waterfall plot, I found it clunky and rather unintuitive to use, so dismissed it.
Another was Spectrum Lab. This is the software, which most Meteor scatter people seem to use, but like Radio SkyPipe, I just couldn’t get it to be able to take the output from the FCD. The programme is quite complex with lots of parameters that need setting. However it has been used for this kind of work and with the FCD, so I will continue to persevere with it in the hope I can get it to work.
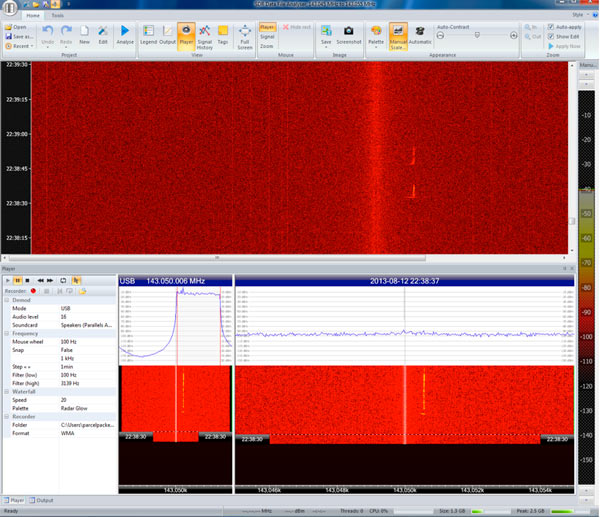
In the short term, I finally settled on SDR Radio V2.0. It seems to provide most of the features of Spectrum Lab, with the exception of event trigger recording and is very easy to understand and use. It also has a data file analyser, which is capable of reading any number of hours worth of data and producing a scrollable plot, which can then be played back and forth and zoomed into for further analysis.
The Perseid peak was rapidly approaching so I fired everything up at 17:00 GMT on the 12th and allowed it to run until 07:00 GMT on the 14th . This produced a number of files totally about 25GB of data. These are then opened up in SDR’s Frequency Analyser, where it was just a case of counting up the number of reflections for each hourly period. This data was then loaded into Excel, where it was plotted onto a bar chart.
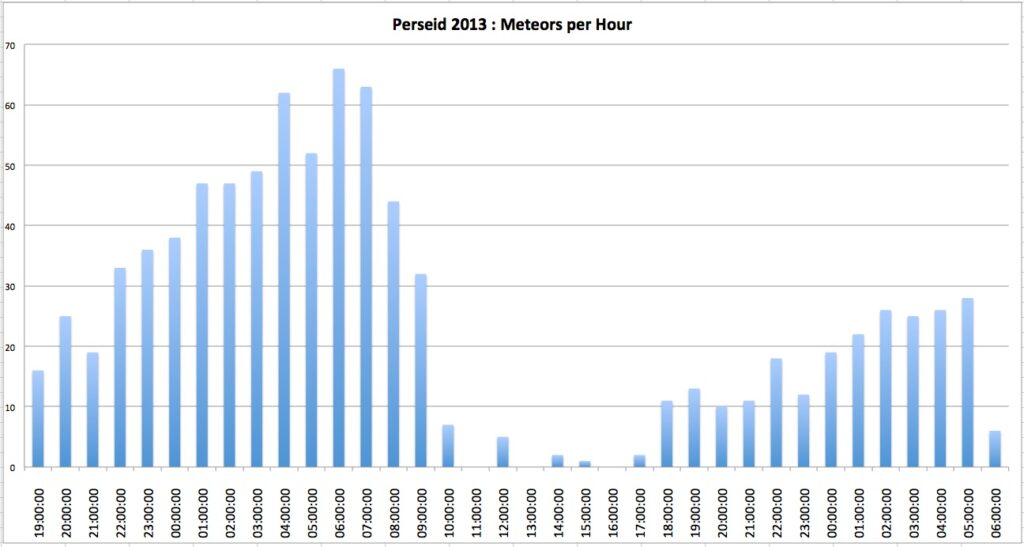
On reflection I would have liked to have started the data acquisition a week either side of the days that I did record. This would have provided a better idea on the background level of meteor activity before and after the showers peak and thus providing context.
The next step will be to look at the echoes in more detail as depending on the shape of them, it is possible to work out if it was travelling towards or away from the receiver and from that you can calculate its Line of Sight speed. With a time index embedded within the plot, you can also see how long the ionised trail lasts before dissipating. I will come back to this soon once I’m sure of the mathematics involved and have gone through all of the data to choose some representative examples.
I also plan to build a better Yagi antenna and continue monitoring all of the various meteor showers over the coming months.