Well after an awful lot of hard graft, the DBO was finally completed in August of 2005.
The only place I could put it that gave me a pretty uninterrupted view of the sky in all directions was the garage. I decided cutting a hole in the roof and locating the observatory under a hatch here, was the best option.


First we had to construct the framework and clamshell lid. Using 24mm marine ply for the frame that would be inserted into the existing garage roof, and 12mm for the clamshell itself, provided enough strength.


Deciding where to cut the hole in the Roof


With the hole location decided on, it was time to bite the bullet and start cutting the hole in the roof. The point of no return…..lets hope it doesn’t rain


With the framework inset into the hole, we could add the preconstructed clamshell and then seal all the joints between the framework and the garage roof with mastic and roofing tape.


The back end of my garage was partitioned off making a space 2.7 metres wide by 1.8 metres deep.
The partition consists of timber framed stud wall and lined with 9mm plywood sheets.


The mount and scope had to be raised quite a way off the concrete floor of the garage, so was mounted on a 2.1 metre long, 5mm wall thickness, steel pipe. This was found in a scrap yard and came complete with a 400mm square 25mm thick plate welded to the base. The whole thing is held down using 10mm blind Rawbolts.


Brian Burt made an adapter to mate the pipe to the Losmandy Mount.


The completed clamshell lid. The clam shell hatch was based on a design by Alf Jacob Nilsen, who’s own observatory is described in Patrick Moore’s book ‘More Small Astronomical Observatories’ published by Springer. Made from ply, the structure is very simple in design and was easy to make. This hinges on a 25mm thick plywood frame that has been inset into the garage roof. To stop it leaking, the felt roof was peeled back and allowed to run up the sides of the coaming. The whole thing was then painted with a rather messy roofing mastic to seal all the joints. So far the design has been watertight.


To stop vibration being transmitted to the pier, a 9mm plywood floor was laid over a 50mm thick layer of expanded polystyrene foam sheet. I then laid some cheap industrial carpet to provide grip and keep the noise down when walking around in the middle of the night.


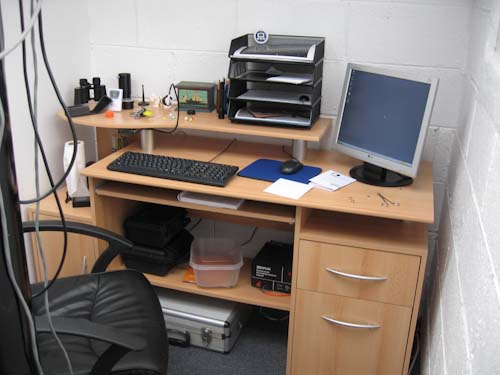
The P.C. workstation that drives…….


…….all this!
To power the scope, dew heater and CCD camera, a constant Voltage power supply was obtained from Maplins for the princely sum of £40…another bargain, as Telescope House were offering a lesser
specified unit for about £60.
The observatory can be remotely operated from the house using a wireless network and Windows XP Remote Desktop Connection software. Slap a load of paint over everything and install a mid priced PC desk at one end, and I’ve ended up with a roomy and permanent imaging setup.
I tried various combinations of how I was going to handle the guiding.


I tried an off axis guider but this still didn’t give a wide enough FOV or a bright enough image to work reliably. So in the end I just used an old Canon camera lens with the guider attached at the back.
My thanks go to all those that spent many hours helping me with this project, notably Abie, Uncle Frank, Mr B, and Paul. I owe you big time guys!
…Oh and why is the observatory called the DBO? Well It was originally intended to be called the Tremorvah Barton Observatory (TBO), but when the design was being drawn up, a someone substituted
‘Tremorvah’ and replaced it with Dick….It’s been known as the Dick Barton Observatory or ‘DBO’, ever since!
For those of you too young (and I’m one of them) to remember ‘Dick Barton’ ….. Click this link for the full effect
In the Summer of 2011, the DBO was dismantled and moved to a darkfield site out in the sticks, where the DBO2 was built to allow both visual and astrophotography to be done. At the same time, a new scope, and Altair Astro 254mm F/8 Ritchey-Chrétien, was acquired.